MinIO service on Windows
1. Download
Get the latest MinIO pkg file by running command:
https://dl.min.io/server/minio/release/windows-amd64/minio.exe
2. Create folder
Before starting the minio server, you need to create a folder where data and other information will be stored. To do this, create a folder on the data carrier, e.g. C:\minio. Remember that the folder can be placed anywhere, for the purpose of this tutorial we chose this location C:\minio.
3. Launch the MinIO server
In PowerShell or Command Prompt, either navigate to the directory where the executable is located or add the path of the minio.exe file to the system's $PATH.
Run this command to start a local MinIO instance in the C:\minio folder. You can substitute C:\minio with a different drive or folder path on your local machine.
.\minio.exe server C:\minio --console-address :9001
.\minio.exe - path to minio.exe file C:\minio - path to minio folder where data will be stored --console-address :9001 - minio console address
4. Minio console
If everything goes well, please open, in web browser, the console using path to WebUI.
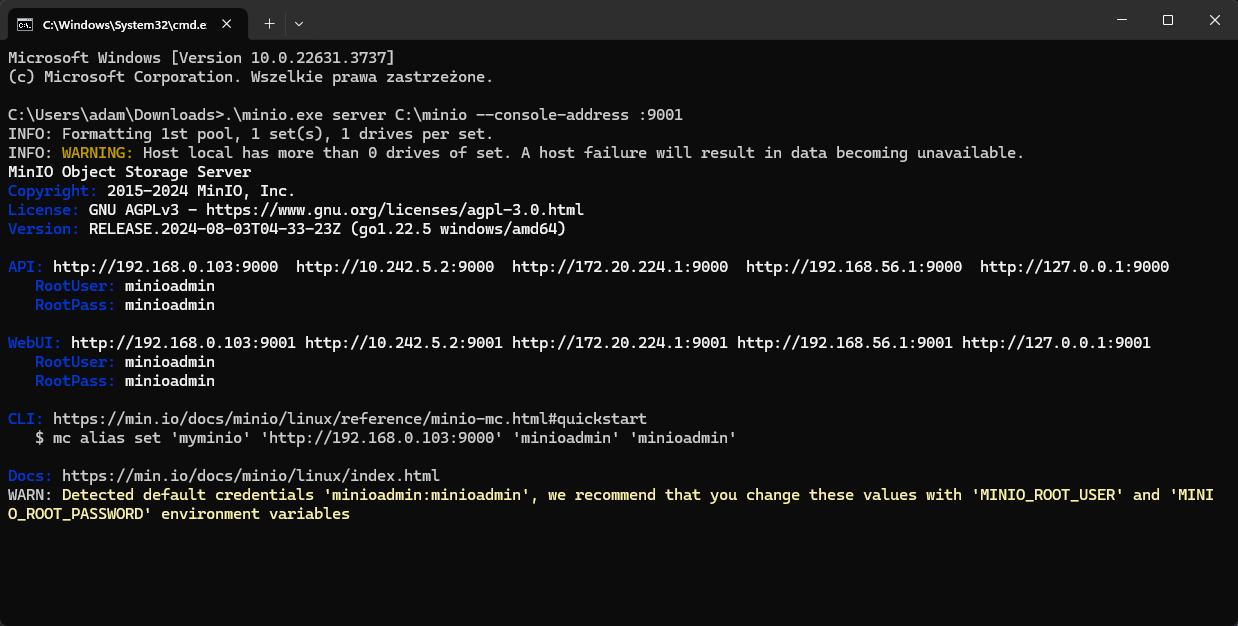
In our example it is http://127.0.0.1:9001. If you see the MinIO console in the browser, it means that everything is working well.
5. After installation
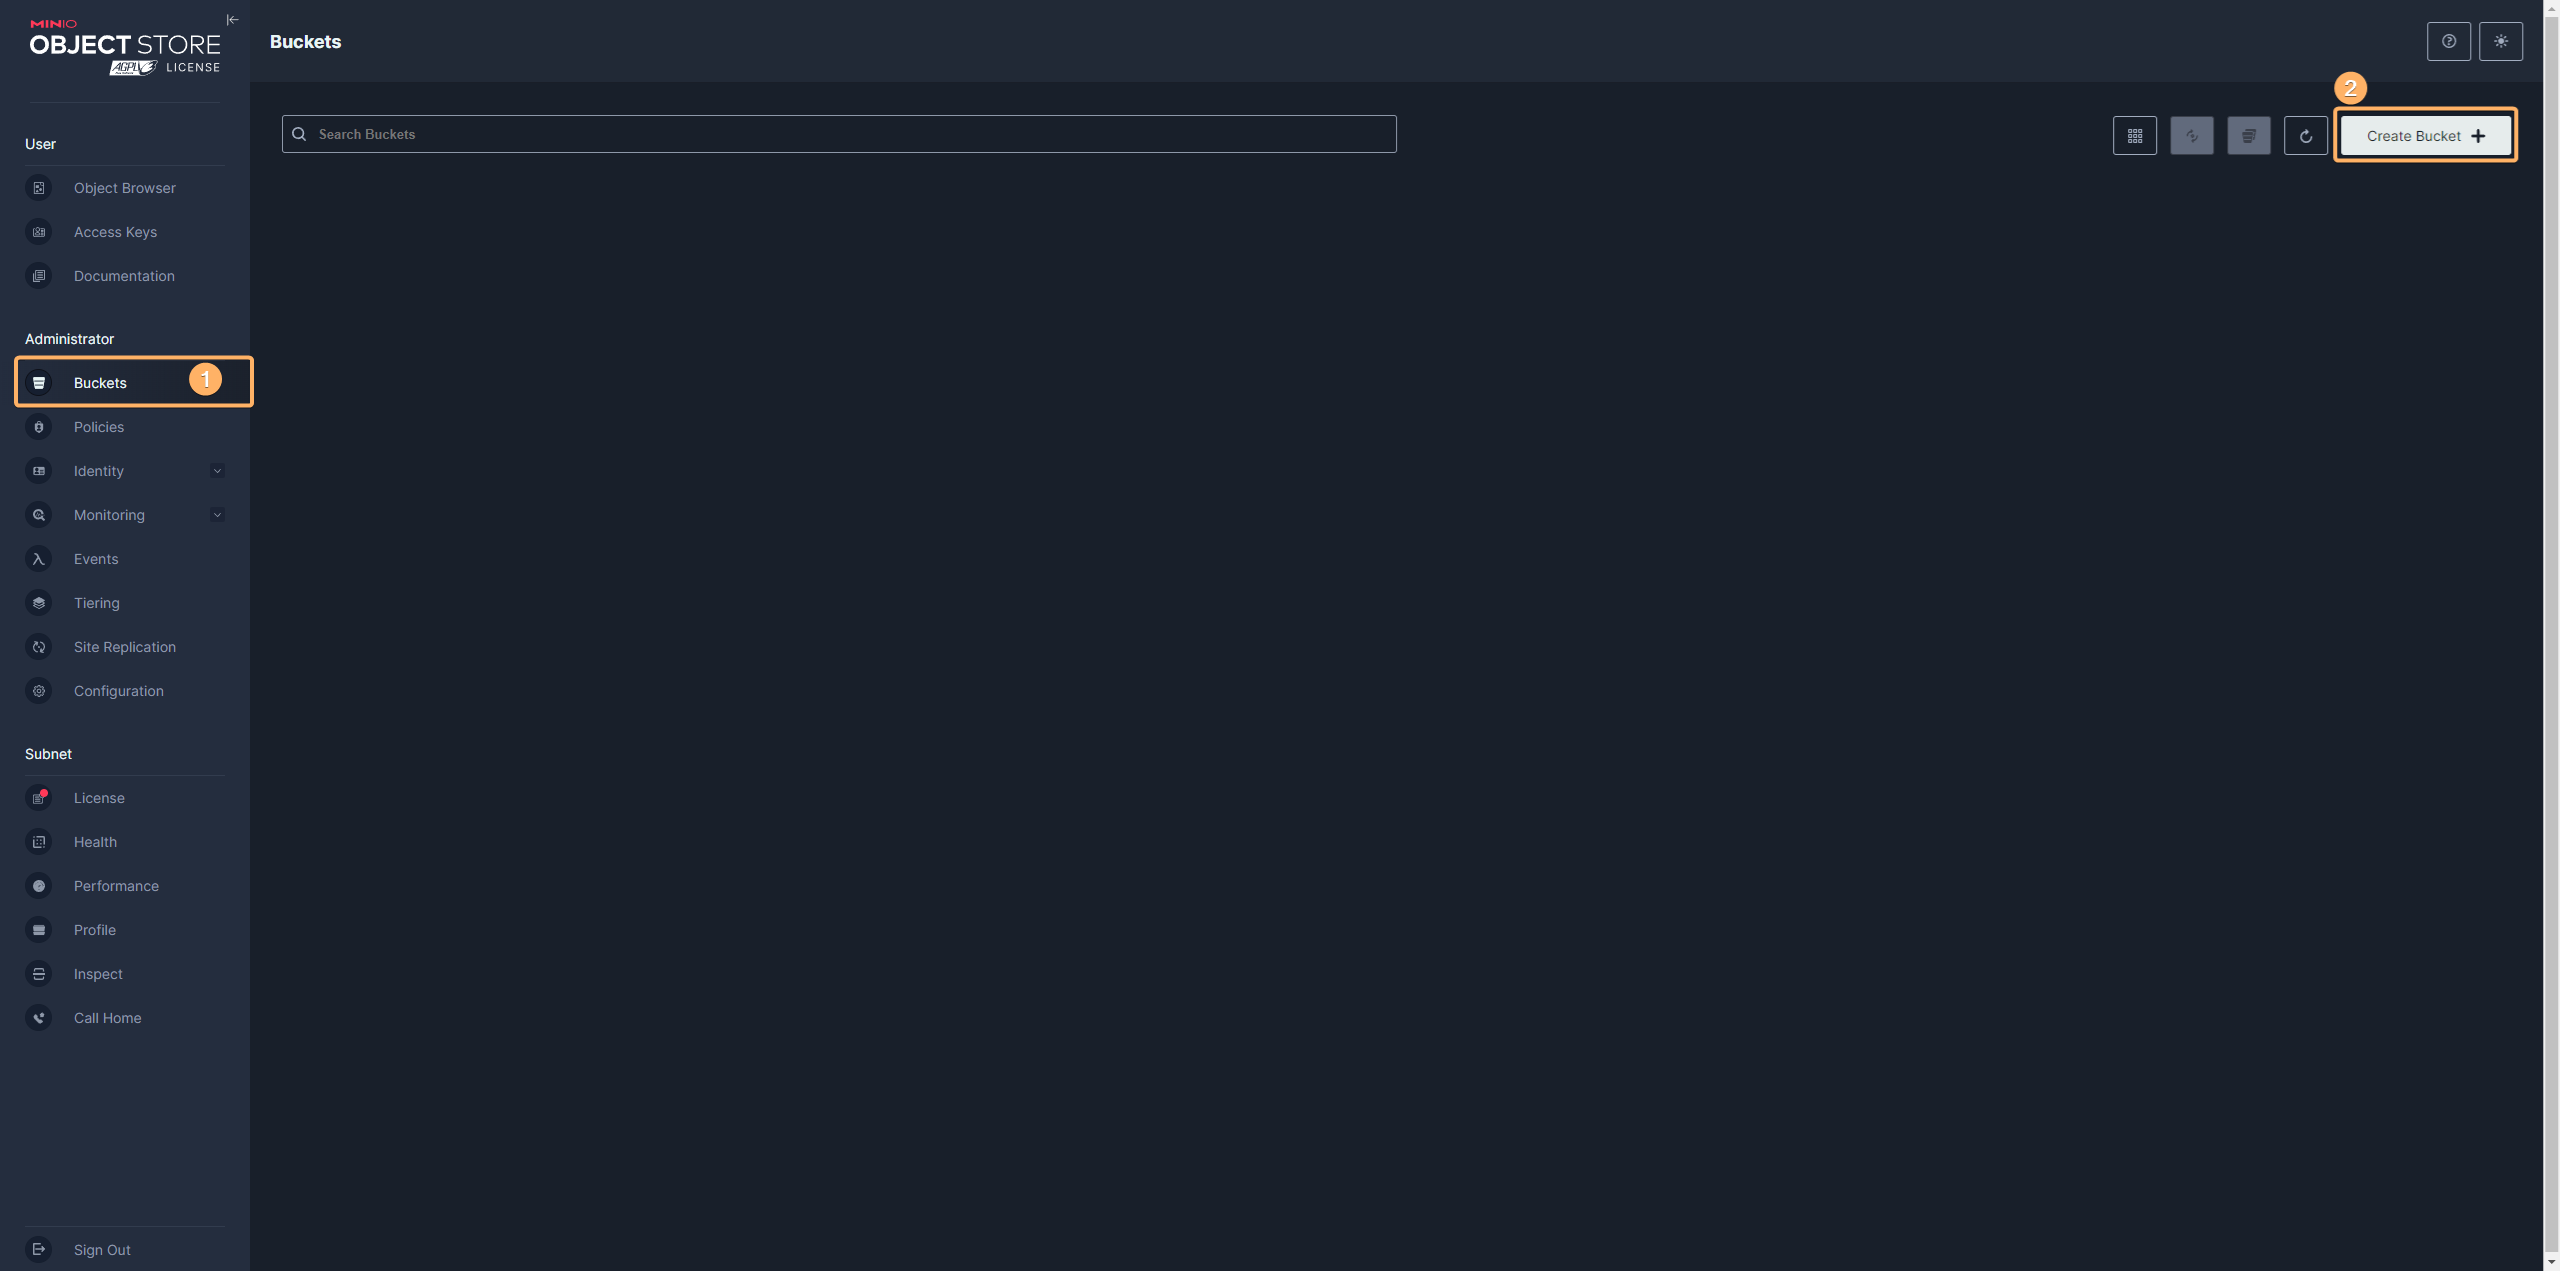
After installing MinIO you still need to add a bucket. To do this please log in to MinIO as an administrator. Then choose "buckets" (point 1) and create the bucket (point 2).
In the next step, a new window should appear, in which you should enter the bucket name. This name should be a compound of tenant-project (e.g. "training-aio"), where "training" is tenant and "aio" is project.
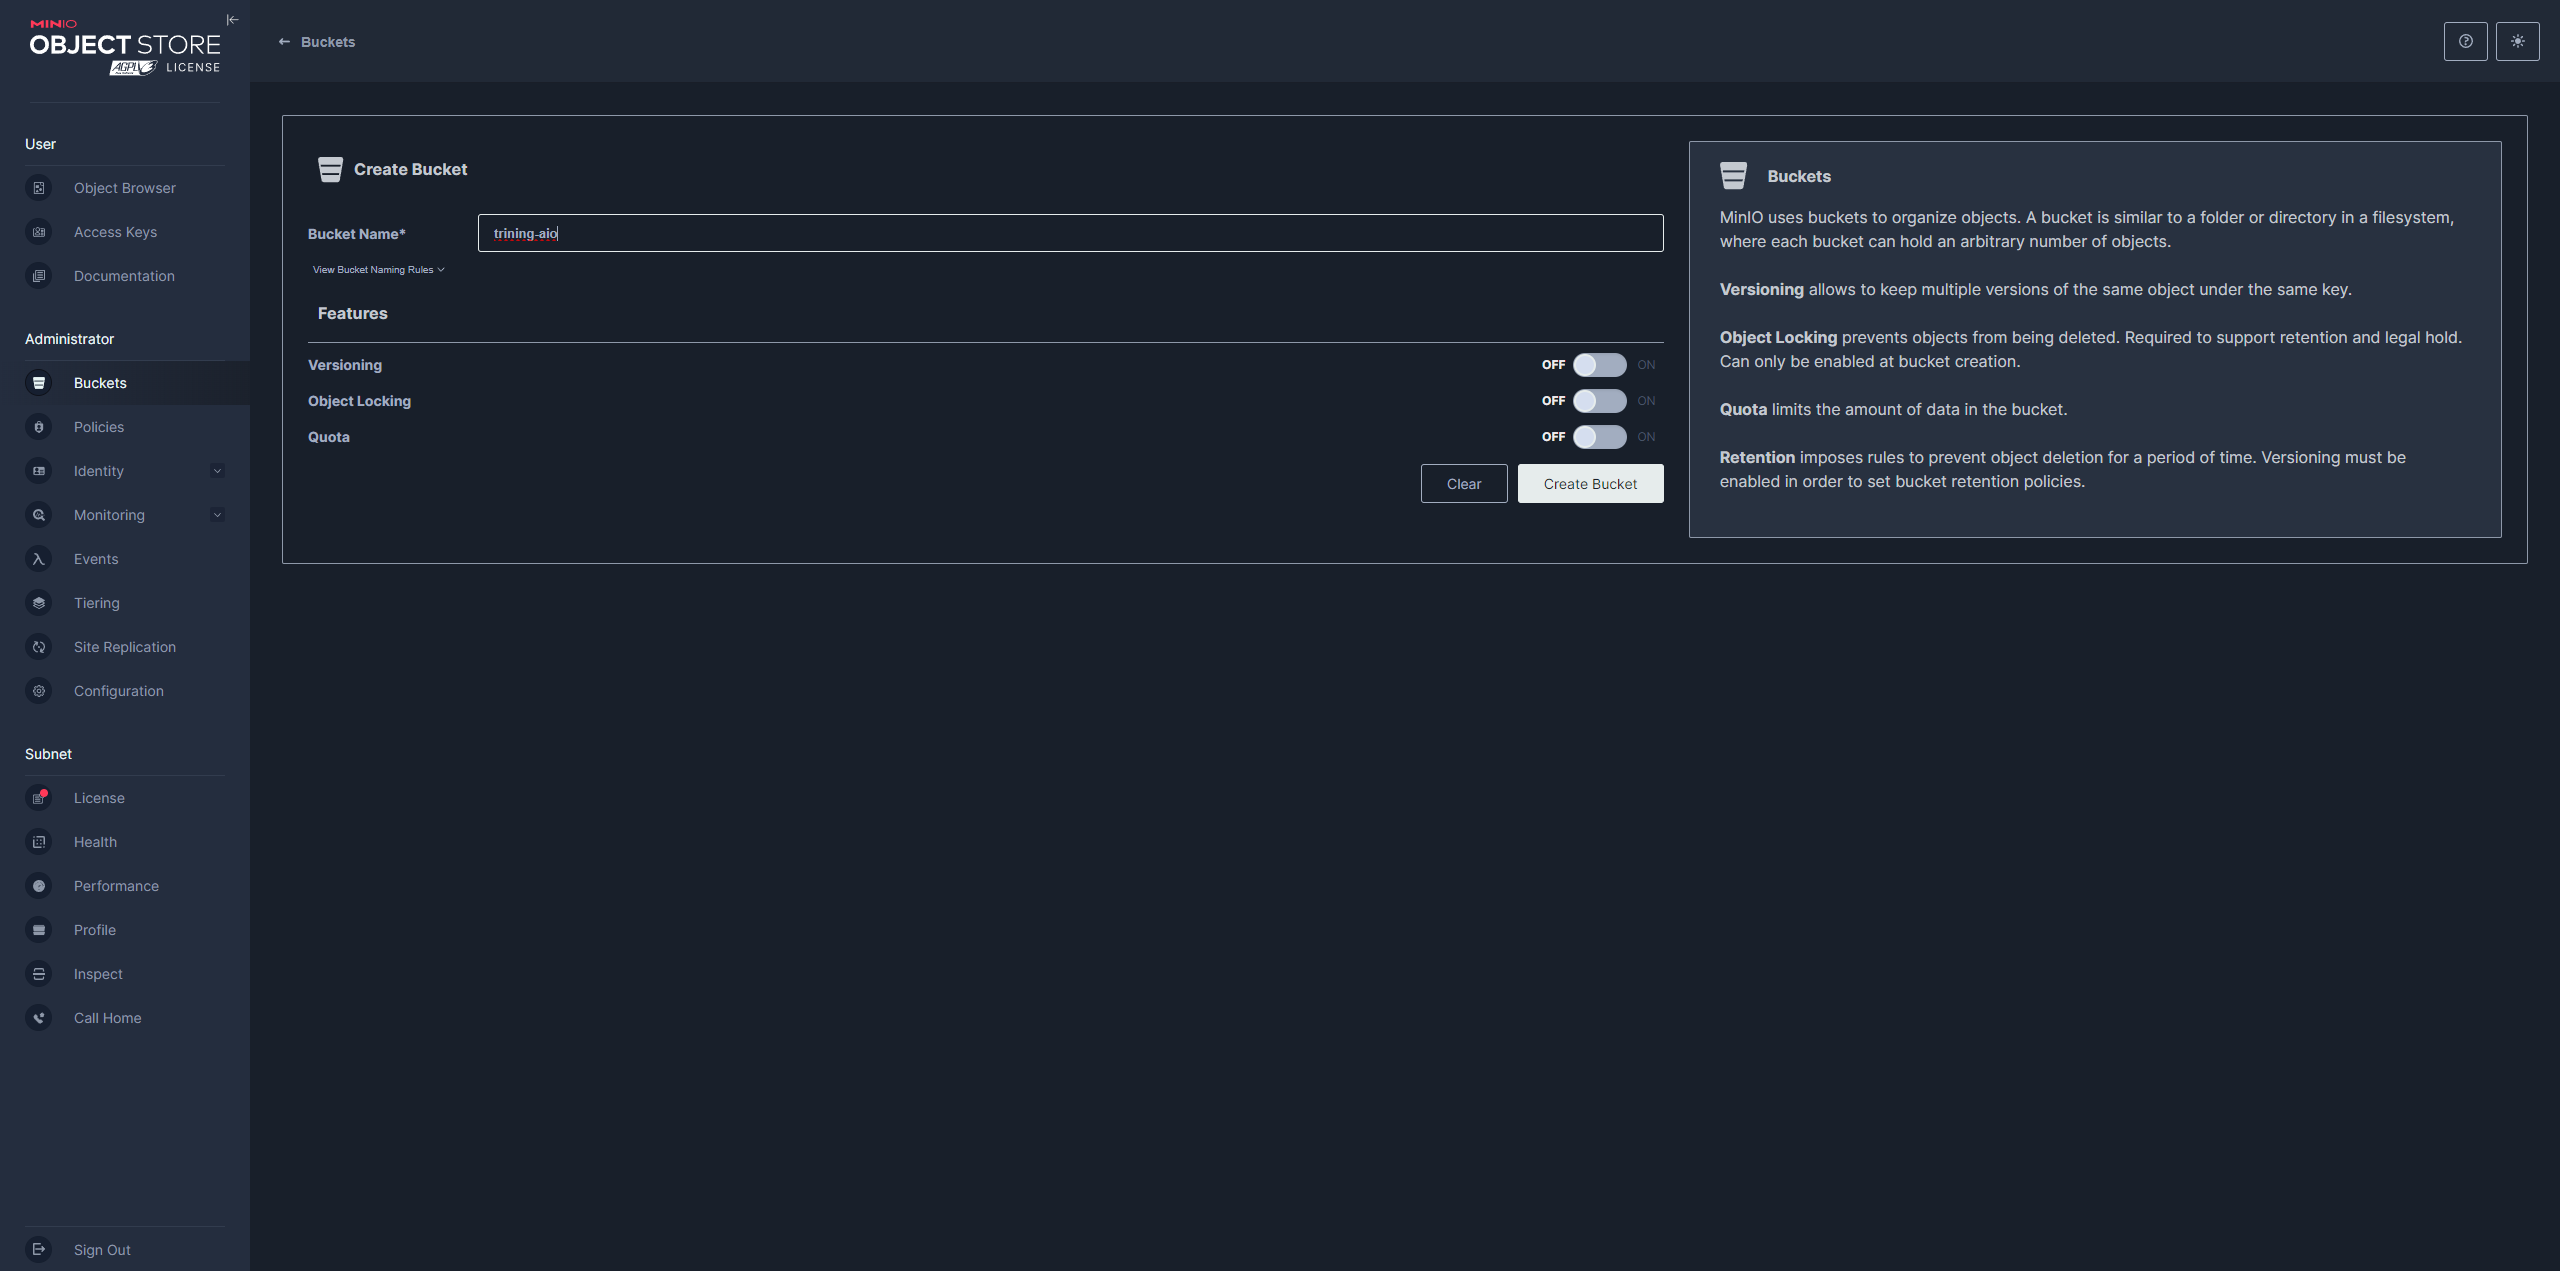
The rest of the options can be skipped and the create button should be pressed.
6. Configuration object storage SDK and rendering worker service
Documentation about configuration of the object storage SDK and rendering worker service can be found here:
Configuration of MinIO
7. Documentation
More details can be found here:
MinIO for Windows